

VAAIG Blog

Why Does Hair Dye Smell So Strong? (And How to Avoid That Chemical Odor)
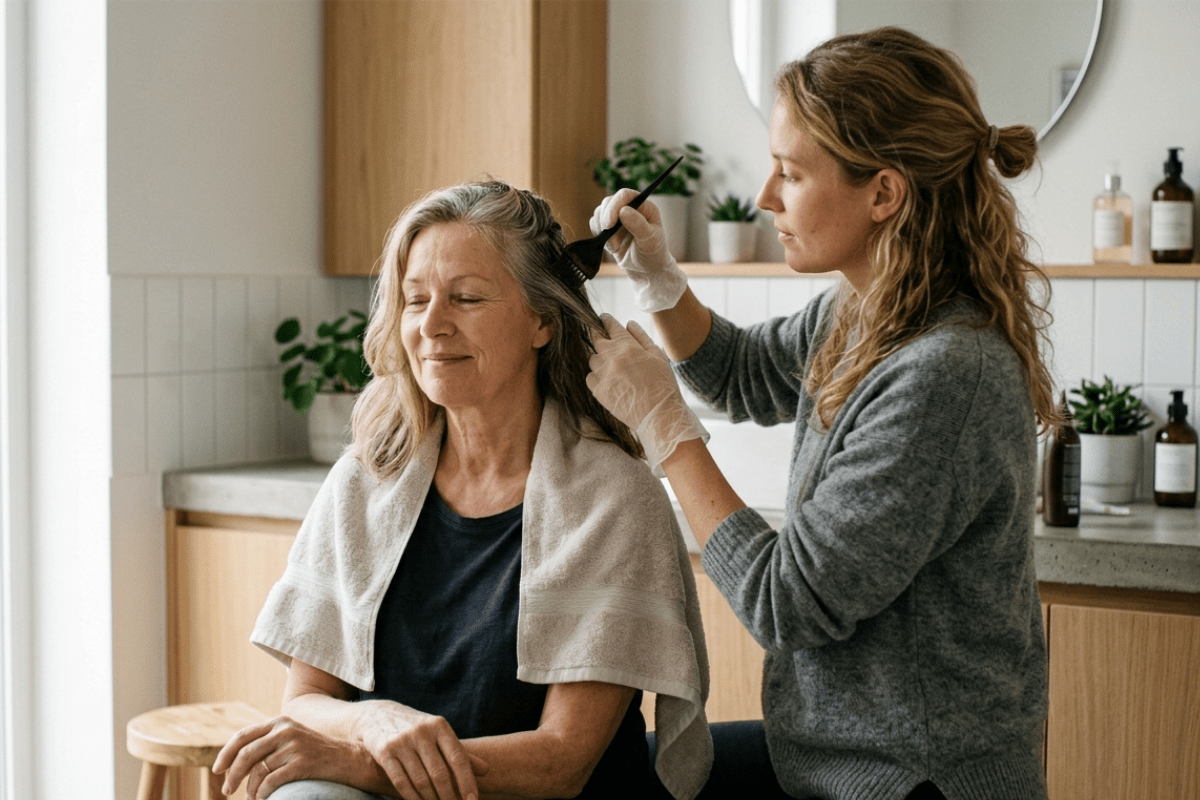
If you’ve ever dyed your hair at home, you probably remember the smell. Not just “a little unpleasant.”More like—open the bottle and it hits you instantly. That sharp, chemical scent that fills the bathroom, lingers in the air, and somehow ends up on your pillow later. For a lot of people, it’s not even the fear of messing up their color that stops them from dyeing their hair again.It’s the smell. So why does hair dye have to smell that strong? It’s Not Actually “Normal” — It’s Just What We’re Used To Most people assume that strong smell is just part of the process. Hair dye = chemical smell.That’s how it’s always been, right? But the truth is, that smell mostly comes from how traditional formulas were designed. Older hair dyes relied on more aggressive ingredients to open up the hair cuticle so color could penetrate properly. Think of it like this: 👉 The formula has to “open” your hair first👉 Then push color inside And that process often comes with a strong, noticeable odor. So what you’re smelling is essentially: The formula doing its job Your hair being opened up And your scalp… reacting to it too Does a Stronger Smell Mean Better Results? A lot of people believe this. “If it smells strong, it must be working.” But that’s not really how it works. A strong smell usually just means the formula is more aggressive—not necessarily more effective. You’ve probably experienced things like: A tingling or burning sensation on your scalp Eyes feeling irritated during application That chemical smell sticking around even after washing That’s not a sign of “better performance.”It’s usually a sign that the formula isn’t very gentle. Why Some People Struggle With It More Than Others Here’s something people don’t talk about enough: 👉 Not everyone reacts to smell the same way Some people just find it annoying.Others genuinely can’t tolerate it. For certain users, that strong odor can cause: Headaches Dizziness The urge to rinse it out immediately This is especially common if you already have a sensitive scalp or are more sensitive to strong scents in general. So no—it’s not being “dramatic.”For some people, it’s a real barrier. Is It Possible to Dye Your Hair Without That Harsh Smell? Actually… yes. Hair color has come a long way. Newer formulas are starting to focus not just on results, but also on the overall experience. That means: Less harsh, chemical-heavy odor More balanced formulas A process that doesn’t feel like something you have to “get through” In other words, you don’t have to choose between color performance and comfort anymore. The Part Most People Overlook When people shop for hair dye, they usually focus on: Color payoff How long it lasts Price But in real life, the first thing you notice isn’t the color. It’s the smell. If that part is unpleasant, it affects the entire experience—no matter how good the results are later. That’s why more people are starting to look for something different. Not just “does it work?”But also: “Can I actually stand using it?” The experience doesn’t have to feel harsh. You don’t have to put up with that strong smell just to get good color anymore. If you want a more comfortable option, you can check out VAAIG’s hair color system here. It’s designed to deliver professional-level results with a much softer, more pleasant scent. A More Comfortable Way to Dye Your Hair The experience doesn’t have to feel harsh. Some newer formulas are designed to reduce that strong chemical odor and make the process feel more manageable. In some cases, the scent is noticeably softer—or even slightly pleasant. That alone can make a huge difference, especially if you dye your hair regularly. For example, with something like VAAIG’s hair color system, the focus isn’t just on getting strong, even color—it’s also on making the process feel more comfortable. Instead of that overpowering chemical smell, the scent is much milder, which makes the whole experience easier to deal with from start to finish. It’s a small detail, but one people tend to appreciate immediately. Final Thoughts That strong hair dye smell isn’t something you just have to put up with. It’s more of a leftover from older, harsher formulas—not a requirement for good results. Today, you can absolutely have: Solid color performance Better comfort And a much more pleasant overall experience Without feeling like you have to “push through” the process. 🔗 Related Articles Best Hair Dye for Sensitive Scalp Why Won’t Gray Hair Take Color? How Long Should You Wait to Wash Hair After Dyeing
더 알아보기
The “Life-Saving” Test Before Hair Dyeing
Why 48 Hours Can Make All the Difference Choosing a hair dye isn't just about the perfect shade; it’s a commitment to your health. Whether you are using a high-end salon brand or a "natural" ammonia-free formula, safety should always be your baseline. 1. The Golden Rule: Why 48 Hours is Non-Negotiable Many people perform patch tests, but the vast majority do them incorrectly. The most common mistake: Applying a small amount of dye, waiting 30 minutes, seeing no reaction, and proceeding with the full color. The Reality: Most allergic reactions to hair dye are "delayed hypersensitivity reactions." This means your immune system may not trigger an alarm until 24 or even 48 hours later. By the time you realize you're allergic, the dye is already on your scalp, and the damage is done. The 48-hour rule isn't just a suggestion—it’s a vital safety window. 💡 Pro Tip: If you plan to dye your hair on Saturday, your patch test must be completed by Thursday. 2. Step-by-Step Guide: How to Perform a Patch Test Correctly The process is simple, but details matter. Follow these steps to ensure accurate results: Step 1: Prep and Clean Choose a spot behind your ear or on the inner bend of your elbow. These areas have thinner, more sensitive skin that closely mimics your scalp. Clean the area gently with mild soap and water, then pat dry. Step 2: Precise Mixing If your dye requires mixing (color cream + developer), mix a tiny amount using the exact ratio specified in the instructions. Testing only one component will yield an inaccurate result. Step 3: Application Use a cotton swab to apply a pea-sized amount to the test area. Let it air dry naturally. Step 4: The Waiting Game Do not cover the area with a bandage or adhesive. Keep it dry and exposed for the full 48 hours. 📸 [Insert Image Placeholder]: Close-up photo of a cotton swab applying dye behind the ear with a caption: "Test in a sensitive area for accurate results." 3. Reading the Results: When to Stop Immediately After 48 hours, you aren't just looking for "pain"—you are looking for subtle skin changes. Green Light: Your skin looks and feels completely normal. Red Light (Stop and Wash Immediately): Visible redness, rash, or blisters. Burning or stinging sensations. Persistent itching. Don't ignore the signs: Many think, "It's just a little red, I'm sure it's fine." In reality, a small local reaction can escalate into severe scalp dermatitis once applied to your entire head. ⚠️ Emergency Warning: If you experience difficulty breathing, dizziness, or facial swelling during the test, seek medical help immediately. These are signs of a severe systemic reaction. 4. Special Advice for Sensitive Skin & Pregnancy Even if you pass the patch test, I recommend postponing your hair dye session if: Scalp Irritation: You have recent scratches, sores, or inflammation on your scalp. Hormonal Shifts: You are in your first trimester of pregnancy or your skin feels unusually reactive due to stress or seasonal changes. Recent Deep Cleansing: You just performed a heavy scalp exfoliation or "detox," which removes the natural protective oils of your skin barrier. 🛠️ Practical Tip: Take a photo of the ingredient list. If a reaction occurs later, this photo helps doctors quickly identify the specific allergen (like PPD or Resorcinol). 🔗 Related Reading: Build Your Safe Hair Care Routine Before you start your test, are you sure you’ve chosen the right product? Explore our guide: Part 1: [Ammonia vs. Ammonia-Free: What’s Actually Happening to Your Hair?] Part 2: [The Sensitive Scalp Guide: How to Dye Without Irritation] Part 3: [Coloring During Pregnancy: A Science-Based Safety Guide] 💬 Let’s Talk! Have you ever experienced itching or discomfort after dyeing your hair? Did you ignore it or take action right away? Share your experience in the comments below! I’m here to help you analyze potential triggers and find a safer way to achieve your dream look. 👇 Disclaimer: This article is for informational purposes only. If you have a history of severe allergies, always consult with a dermatologist before using chemical hair products.
더 알아보기
5 Daily Habits That Are Secretly Stealing Your Salon Glow
And How to Stop the Fade You leave the salon feeling like a million bucks. Your color is rich, your hair is glossy, and you’ve even opted for a gentle, ammonia-free formula to keep things healthy. But then, reality hits. A few weeks later, that vibrant chocolate brown looks a bit muddy, or your cool blonde starts turning a suspicious shade of brass. It’s frustrating, right? Here’s the thing: Your color's lifespan isn't just decided in the stylist's chair—it's decided in your bathroom. You might be surprised to find that some of your most ingrained daily habits are actually acting like tiny erasers on your hair pigment. Let’s break down the "secret color-killers" and how you can fight back. 1. The "Too Hot to Handle" Styling Trap We all love the polished look of a fresh blowout or glass-straight hair. However, every time you crank up the heat on your tools, you’re essentially forcing your hair’s cuticle to stand wide open. When that cuticle lifts, your expensive color molecules simply slide right out. The Fix: Think of heat styling like sunbathing—you wouldn’t do it without SPF. Always prep with a high-quality heat protectant. More importantly, try the "180 Rule": keep your tools below 180°C (356°F). If your iron is smoking, you’re not just styling; you’re "cooking" the color out. 2. The Invisible Bleach in the Sky We protect our skin from UV rays, but we often forget that the sun doesn't discriminate. UV radiation breaks down the chemical bonds in your hair dye. It’s a slow, invisible bleaching process that leaves dark hair looking dull and light hair looking brassy. The Fix: If you’re going to be outdoors for more than twenty minutes, treat your hair to a UV-shielding spray. Or, better yet, lean into the "chic traveler" aesthetic and wear a wide-brimmed hat. Your hair (and your colorist) will thank you. 3. The "Vacation Mode" Hair Strip Nothing ruins a fresh dye job faster than a dip in the pool. Chlorine is essentially a harsh cleaning agent that searches for pigment to strip away, while salt water draws out moisture, leaving the hair shaft rough and "thirsty." The Fix: Before you jump in, drench your hair with clean tap water. Think of your hair like a sponge—if it’s already full of fresh water, it can’t absorb the chlorinated stuff. For extra credit, comb through a bit of leave-in conditioner to create a waterproof barrier. 4. The Hidden Enemy in Your Shower Head If you feel like your color looks "muddy" or ashy despite using great products, the culprit might be your plumbing. Hard water is packed with minerals like calcium and magnesium. These minerals create a microscopic film over your hair, blocking shine and shifting the tone of your color. The Fix: You don’t need to replumb your whole house. A simple filtered shower head can be a total game-changer for color-treated hair. Once a week, use a gentle clarifying treatment to "reset" the minerals, followed by a deep-moisturizing mask. 5. The "Fresh Color" Washing Itch This is the most common mistake: washing your hair too soon or too often. The first 48 to 72 hours after coloring are the most critical—this is when the pigment is still "settling" into the hair shaft. The Fix: Be patient. If you can, wait at least three days before that first post-salon wash. And when you do wash, avoid the "scalp scrub" mentality. Use lukewarm water (never hot!) and stick to sulfate-free, color-safe formulas. Pro Tip: If you’ve just left the salon, you’ll want to check out our deep dive: [Just Colored Your Hair? Don't Wash It Yet]. It covers the science of why those first few days make or break your color’s longevity. Related Articles: Just Colored Your Hair? Don’t Wash It Yet Why “Color-Safe” Is More Than Just a Marketing Label
더 알아보기
Just Colored Your Hair? Don’t Wash It Yet —
Or You Might Ruin the Color 1. The Moment After Coloring (And the Hidden Mistake) You’ve just spent hours in the salon.The color is exactly what you wanted — rich, glossy, elevated. Then reality hits:Your scalp feels a little oily.You start wondering:“Can I wash my hair now?”“Will one wash fade the color?” Here’s the truth most people don’t realize:Your first wash can determine how your hair looks for the next 4–6 weeks. 2. So… When Can You Wash Your Hair? The ideal window: 48–72 hoursThis is the industry-standard “color setting period.” Why You Need to Wait?Cuticle closure takes time,Hair coloring opens the cuticle (the outer layer of your hair) so pigment can enter,But it doesn’t close instantly. If you wash too early:→ The cuticle is still open→ Color slips out before it locks in Pigment needs time to settleHair dye doesn’t just sit on the surface.It needs time to bond with the hair structure. Fresh color ≠ stable color Special Cases Semi-permanent color → fades faster, needs even more care Plant-based dyes → slightly shorter wait, but still best to wait at least 48 hours 3. Why Washing Too Early Ruins Your Color This is where most people unknowingly sabotage their results. Faster Color Fading When water hits unsealed hair:→ Pigment washes out immediately→ Cool tones (ash, beige, gray) fade the fastest Increased Hair Damage Right after coloring, your hair is in a fragile state.If you combine that with:Hot water,Rough washing,Harsh shampoo.You get: Dryness,Frizz, Dull, uneven color. 4. Your First Wash: What Most People Get Wrong This step matters more than you think. Water Temperature Matters Use lukewarm water (around 86°F / 30°C) Hot water → opens cuticles → color loss Cool water → keeps cuticles sealed → locks color Choose the Right ShampooLook for:Sulfate-freepH-balanced (slightly acidic)Color-safe formulasThese are essential for color-treated hair care. Wash Your Scalp, Not Your Ends Correct technique:Focus on cleansing the scalpLet foam gently run through the lengthsAvoid rubbing the ends (where pigment is most concentrated) 5. How to Make Your Hair Color Last Longer If you want that “just-colored” look to stay:Wash Less Frequently Ideal: 2–3 times per week Use dry shampoo if needed The more you wash, the faster it fades. Protect Your Hair From the SunUV exposure is one of the biggest causes of fading.Especially for: Ash tones Beige tones Cool browns Deep Condition WeeklyHair coloring = mild chemical damageUse a hair mask once a week to: Restore smoothness Improve shine Help lock in color 6. FAQ Q: What if my hair feels too oily to wait?A: Use cool air to refresh the roots or apply a small amount of dry shampoo. Avoid washing with water. Q: The salon washed my hair after coloring — does that count?A: Yes, but that wash is to remove chemical residue.You should still wait 48 hours before washing again at home. 7. Final Thought Great hair color isn’t just about the dye —it’s about what you do after.Most people lose their color early because of one mistake:Washing too soon.Wait 48 hours.And your color can stay vibrant for weeks. What hair color fades the fastest for you?Ash? Red? Blonde?Share your experience below. Related Reading: 5 Daily Habits That Are Secretly Stealing Your Salon Glow (And How to Stop the Fade)
더 알아보기
DIY vs. Salon: Is Saving $100+ Worth the Risk?
Let’s face it—salon visits aren’t cheap. Between the service, the tip, and those overpriced "designer" shampoos they try to sell you at checkout, you’re looking at $150 or more for a single trip. But we’ve all witnessed (or experienced) the dreaded DIY disasters—hair that turns orange or a scalp that feels like it's on fire. So, where’s the middle ground? The Hidden Costs: It’s Not Just Money It’s not only about the cost; it’s also about the time. You have to book weeks in advance, drive there, and then sit in the chair for 3 to 4 hours. For someone with a packed schedule, that’s a huge “cost” too. The Fear of “Cheap” Box Dye A lot of people stick with salons simply because they’re afraid of DIY. Drugstore dyes have earned a bad reputation for that strong chemical smell and that awful "scalp sting." But the biggest fear? Ruining your results. Many home dyes lead to "Flat Color" that looks fake, almost like a wig. This usually happens because the pigments are low-grade. If you've ever wondered why some dyes fade to a weird orange in days, it's all about the chemistry. Quick Check: Before you pick up a box, you need to know [how long your hair color should actually last] to see if your current brand is underperforming. The Real “Hack”: Professional Results Without the Salon Drama There’s a better way to cover your gray hair at home. Most people assume they have to choose between a gentle formula with weak results or a harsh, chemical-packed dye for strong coverage. Modern at-home systems now deliver both—full gray coverage and long-lasting color with zero irritation. For example, VAAIG’s at-home hair color system combines Professional-Grade pigment performance with a gentler, ammonia-free approach. This means you don’t have to sacrifice comfort for results. 👉 [Check out our 4-Color Collection: Salon-Quality Color meets Medical-Grade Safety] How to Keep Your Color "Salon-Fresh" (And Save Even More) If you want your DIY job to look professional, you need a strategy: Don’t Over-Wash: Your color will stay vibrant much longer if you follow the "Golden 48-hour" rule. Target the Roots: You don't always need a full head of dye. Strategic touch-ups save you money and keep your hair healthy. Protect Your Skin: If you have sensitive skin, "Medical-Grade" isn't just a buzzword—it's the difference between a relaxing evening and a week of itchy scalp. The Bottom Line If you have $200 and 4 hours to spare every month, by all means, go to the salon. But if you want the same “expensive” look, a happy scalp, and a lot more time and money in your pocket, DIY with a high-quality kit is the real winner.
더 알아보기
How Long Does Hair Color Last?
Why Your Color Fades Faster Than It Should Have you ever wondered why that stunning, vibrant shade you got just a week ago already looks dull and washed out? Is it the product, or is your hair just "not holding" the pigment? Understanding the "life cycle" of hair color is the secret to maintaining that salon-fresh look without compromising your scalp health. 1. The Reality Check: What is "Normal" Staying Power? Not all hair colors are created equal. Depending on the technology used, here is what you should expect: Permanent Hair Color: Should ideally last 6 to 8 weeks. While it will gradually lose its luster, the base pigment stays deep in the fiber. Semi-Permanent Color: Usually lasts 2 to 4 weeks (about 10–15 shampoos). Pro Tip: If your color is visibly fading after just 3 washes, your hair cuticles might be too damaged to "lock" the pigment. 2. The Science of Staying Power: Why Ours Lasts Longer The biggest culprit behind fading is "Surface Pigmentation"—color that only sits on the outside of the hair. Our formula is engineered with Professional-Grade Color Brilliance. Unlike drugstore brands, we use high-purity micro-pigments that act like tiny magnets, anchoring themselves deep inside the hair shaft. This means you get a richer, more saturated look that withstands more washes. 3. 3 Secrets to Making Your Color Defy Time Step 1: The "Golden 48-Hour" Rule Don’t rush to the shower! It takes 48 hours for the cuticles to fully close and trap the pigment. Washing too soon is the #1 reason for premature fading. Step 2: Prioritize "Medical-Grade" Scalp Care Many people fear frequent touch-ups because of scalp burning or itching. We believe your scalp deserves Medical-Grade Scalp Friendliness. By incorporating soothing botanical complexes, we ensure that your scalp stays calm and hydrated. A healthy scalp environment is the foundation of long-lasting color. Step 3: Strategic Root Touch-ups Instead of re-dyeing your entire head (which causes damage), focus on the roots. Because our formula is so gentle, you can perform maintenance safely at home. See why this is the smartest move in [DIY Dyeing vs. Salon: Which is More Cost-Effective?]. 4. Conclusion: Don't Settle for Faded Results A normal hair color cycle should be 1.5 to 2 months. If you aren’t hitting that mark, it’s time to upgrade your formula. You don't have to choose between "stunning color" and "scalp safety." With our dual-action approach—Professional-Grade Color + Medical-Grade Scalp Care—you can enjoy a vibrant, salon-quality look that feels as good as it looks. Ready to find your perfect, long-lasting shade? [Shop the Full Collection: Professional Results Meets Medical-Grade Safety]
더 알아보기